How to Measure Flour Correctly for Better Baking Every Time
Dense muffins? Dry cookies? The problem might not be your recipe, but how you measure your flour. For the longest time, I couldn’t figure out why my baked goods were so inconsistent until I discovered this was the key. Mastering this one simple technique transformed my baking from mediocre to masterpiece-level, and it will ensure your breakfast and snack baking is consistently perfect, too.
How to Measure Flour Correctly for Better Baking Every Time
Course: GuideCuisine: AmericanDifficulty: EasyServings
1
techniquePrep time
2
minutesCooking timeminutes
Total time
2
minutesIngredients
1 – Bag – All-Purpose Flour
1 – – – Digital Kitchen Scale (optional, but highly recommended)
Directions
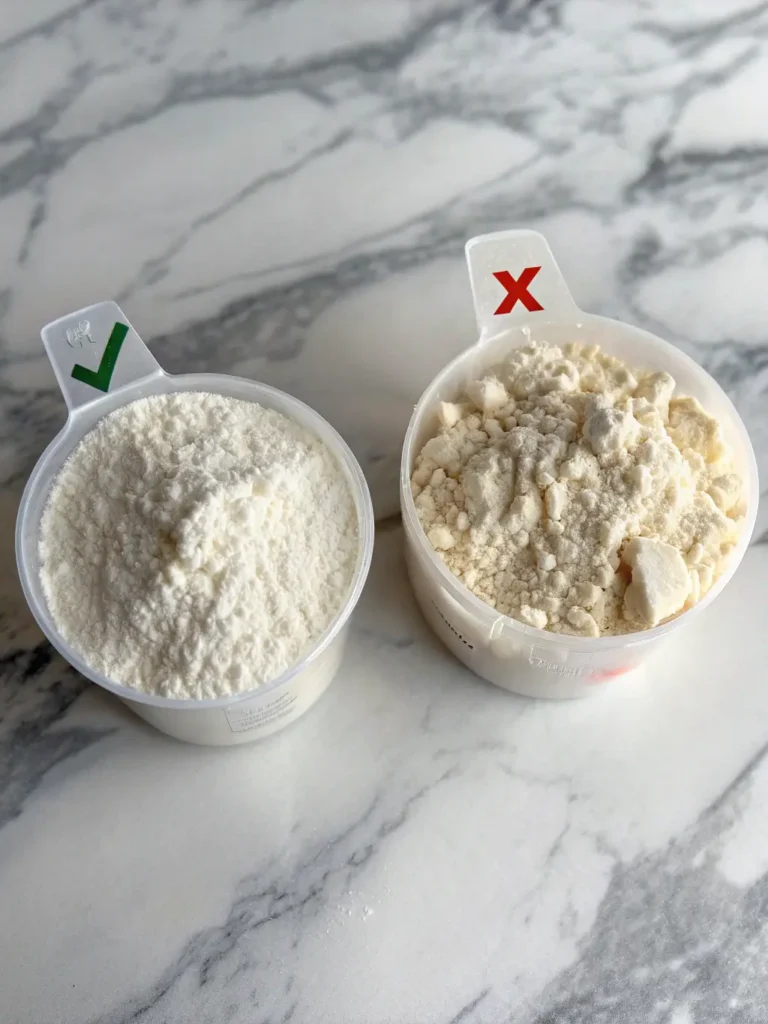
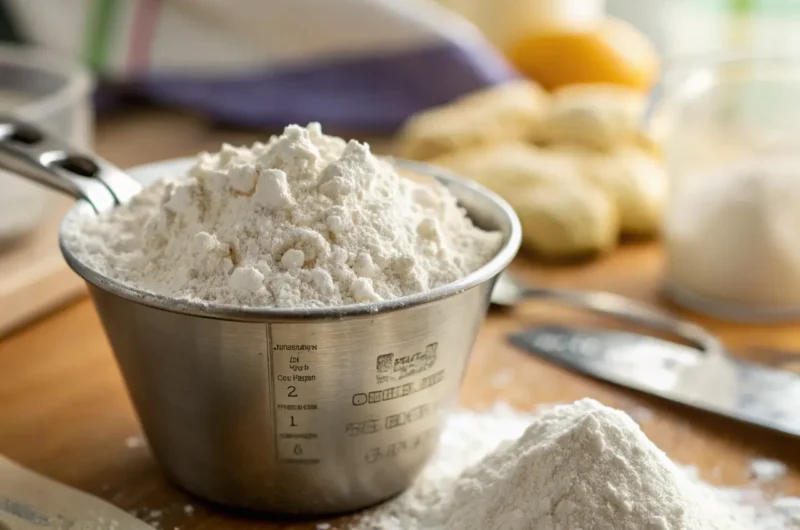
- Fluff the Flour: Before you scoop, use a spoon or whisk to fluff up the flour inside the bag or container. Flour settles and compacts during shipping.
- Spoon & Sweep: Gently spoon the fluffed flour into your dry measuring cup until it’s heaping over the top.
- Level it Off: Use the straight edge of a knife or a bench scraper to level the flour flush with the top of the measuring cup. Do not tap or shake the cup.
- The Scale Method (Gold Standard): For ultimate accuracy, place your mixing bowl on a digital kitchen scale and tare it to zero. Gradually add flour until you reach the weight specified in your recipe (e.g., 1 cup of all-purpose flour = 120-125 grams).
Notes
- Why This Matters: Scooping flour directly with the measuring cup packs it in, leading to up to 25% more flour than intended. This is the #1 reason for dense, dry baked goods.
Embrace the Scale: If a recipe provides gram measurements, use them! A kitchen scale is the best investment you can make for consistent baking. It’s faster and creates less mess.
Don’t Tap! Resist the urge to tap the cup on the counter to “settle” the flour. This defeats the purpose of spooning and leads to compaction.
Recipe Readiness: Always check your recipe to see if it specifies “1 cup flour, spooned and leveled.” This is a sign of a well-tested recipe!